A convenient way to add games to RetroX is using a NAS server, this will allow to share your game collection to all your RetroX devices in your home network. It’s like having your “own cloud” in your own home.
You can find several commercial NAS solutions, but for RetroX you can simply use a Raspberry Pi and one or more USB drives.
Using this guide you will turn your Raspberry Pi in a cool NAS device for RetroX.
You will need:
- 1 Raspberry Pi
- 1 SD Card for the operating system
- 1 Ethernet cable (just for setup if you have a wifi dongle)
- Optional: USB Drives to store your games. The more, the better
Step 1 – Install the operating system
The first step is to download OpenMediaVault (OMV). This is a Linux distribution to build a NAS server solution easily, it has a web based console where you can do a lot of things, including sharing your folders for RetroX. This is what we will use as a base.
Just follow the instructions provided to create a bootable USD disk.
You will end with OMV in your SD Card. Put the SD Card in your Raspberry Pi, connect the ethernet cable and turn it on.
Step 2 – Initial Setup
Once the system is booted, you will see on the screen the data required to connect to the web admin console, basically:
- The IP address of your Raspberry Pi
- An user and password
Open a web browser in any computer in your home network using the ip address provided. Then log in with the user and password.
In the screenshot below, my IP address is 192.168.30.102 and my user was admin.

Open Media Vault log in
Once logged in, set at least the following configuration:
- General Settings -> Web Administrator Password : set your favorite password to log in this web console
- Network -> General -> Hostname : This is the name for your NAS. Keep it short and simple.
- Network -> Interfaces -> Add -> Wifi : Enable your wifi if you want to go wireless
Step 3 – Adding Storage
You can share any folder from your SD Card, if that’s enough for you, you can skip this step.
If not, plug your USB drive and go to Storage -> File Systems. You will see your USB Drive listed with its label. If you haven’t set a label in your drive, look at those devices named as “/dev/sd…“.
In this sample screenshot I have two USB drives called FAT16GB and NTFS-32G
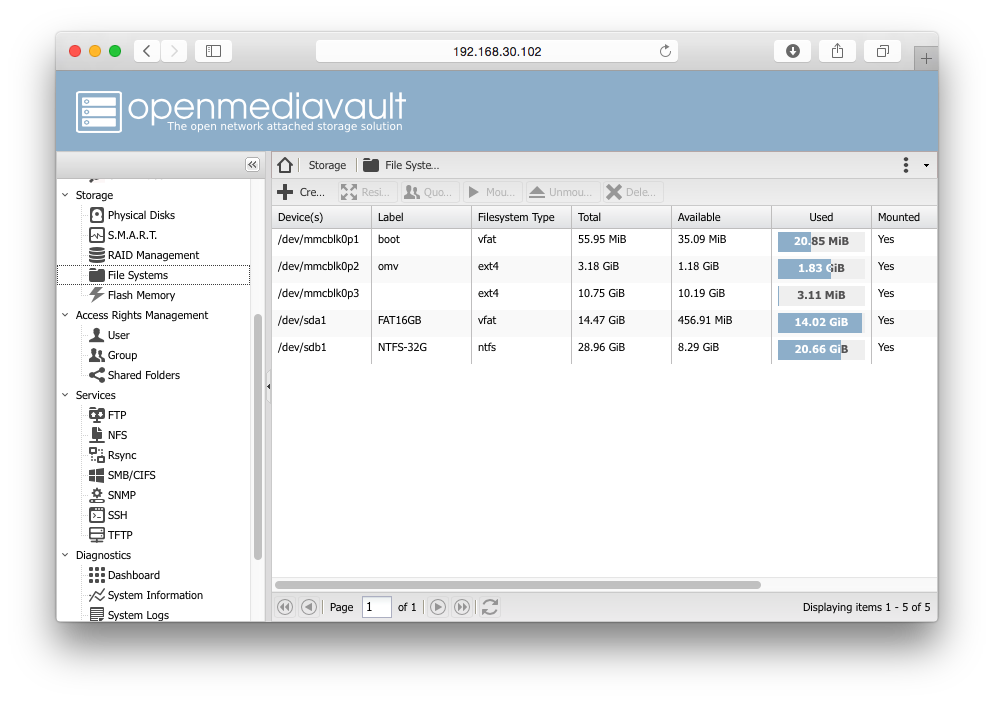
Storage View
At first, the drive will not be mounted, that is, the drive will be connected but not ready to be used by OMV. Just select the drive and then press on Mount to make it available for OMV. Once mounted you will see the amount of total and free space in the drive as shown above.
You can add as many drives as you want.
Step 4 – Create an user
You can share your folders to be accessed with no user/password, but that will restrict you to access them as read-only, so you won’t be able to add new files from other computers. It is recommended to create a user that will be able to write in the drive.
Note that this doesn’t mean that you will need to put an user and password every time you access the drive, only that if you need to write in the drive, you can connect to your NAS with this authorized user.
Go to Access Rights Management -> Users and press Add to create a new user. Just set the name and password.
Consider to use the simplest name possible, a lowercase of your initials is a safe bet. Here I choose fcatrin as my user name.
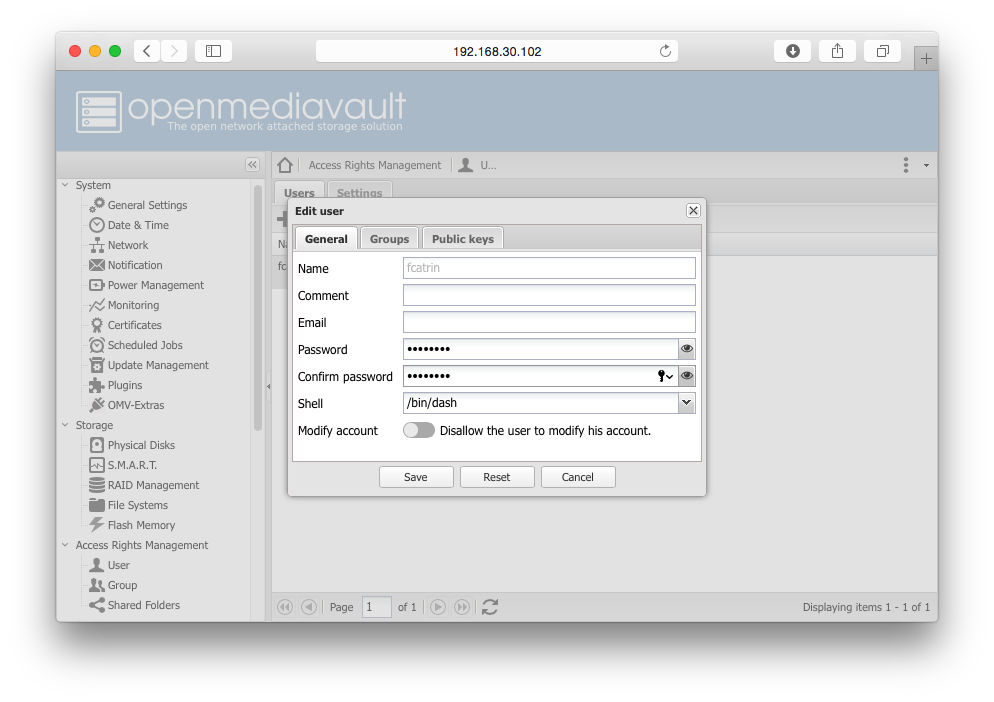
Create an user
Step 5 – Create a shared folder
Shared folders in OMV are independent of the protocol being used to share them later (SMB, NFS, etc). In this stage you will define where is the folder to share and how the permissions will be set.
In the following sample shot, the “games” folder in the FAT16GB device will be shared as RetroXGames.
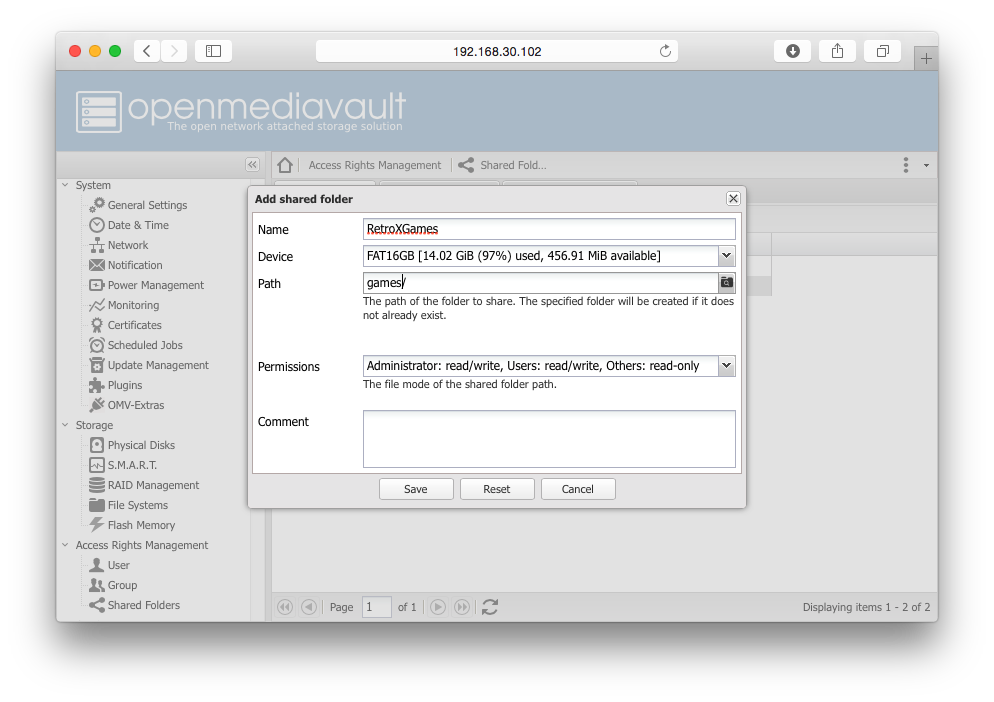
Sharing a folder
Then press on Privileges to define the users and their access level
In the shot below you can see that the user fcatrin has read/write access to the shared folder
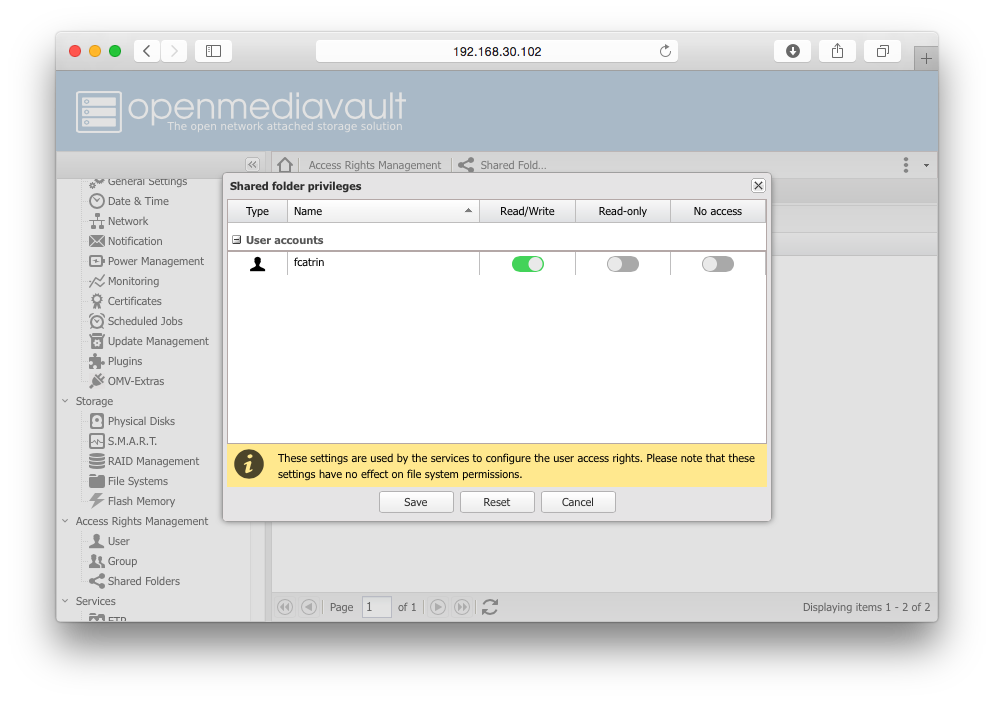
User permissions
Step 6 – Enable the SMB/CIFS service
Your shared folders can be shared using several service protocols, here we will focus only in SMB/CIFS which is what RetroX uses.
Go to Services ->SMB/CIFS and use at least these values in Settings:
- General settings -> Enable -> Turn it on
- Workgroup -> WORKGROUP
- Local master browser -> Allow
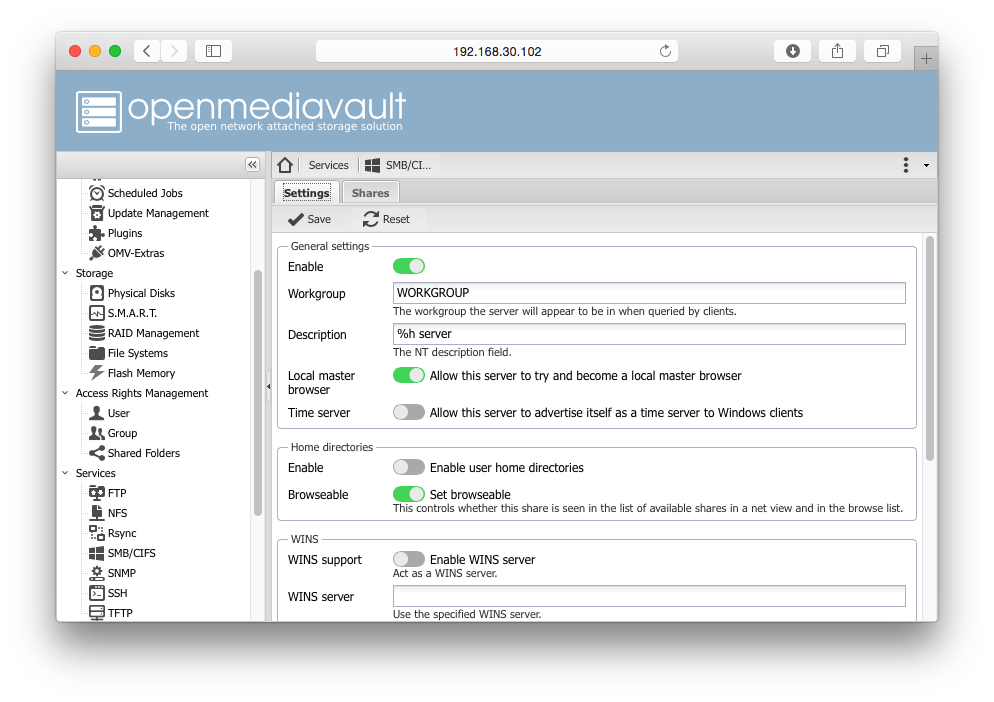
SMB/CIFS Settings
Final step – Share your folders using SMB / CIFS
Finally, in the same place, Services -> SMB/CIFS go to Shares -> Add
Set at least the following:
- Enable -> On (of course)
- Shared folder -> Select the shared folder that you want to share via SMB
- Public -> Choose one of
- No: A valid user is required
- Guest Allowed: You can access with an user or you can access with NO user
- Only guest: Always access with NO user
- Browseable -> On
- Hide dot files -> On (faster for big folders with a lot of hidden files)
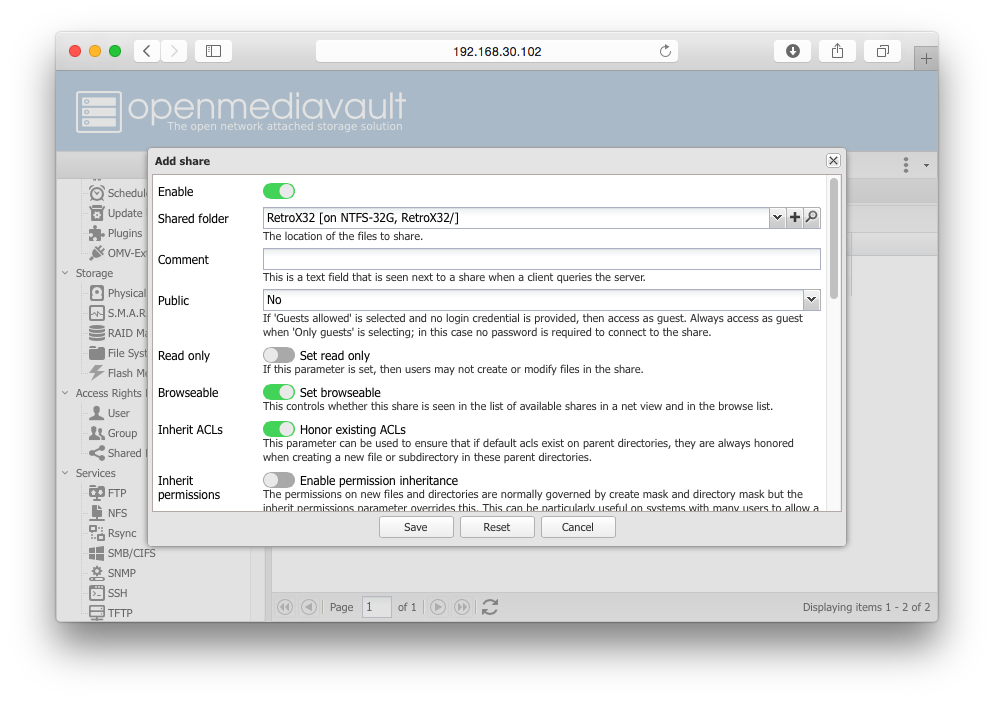
Share folder via SMB / CIFS
And that’s all!
Now you will be able to access your Raspberry Pi as a NAS device from RetroX and other systems
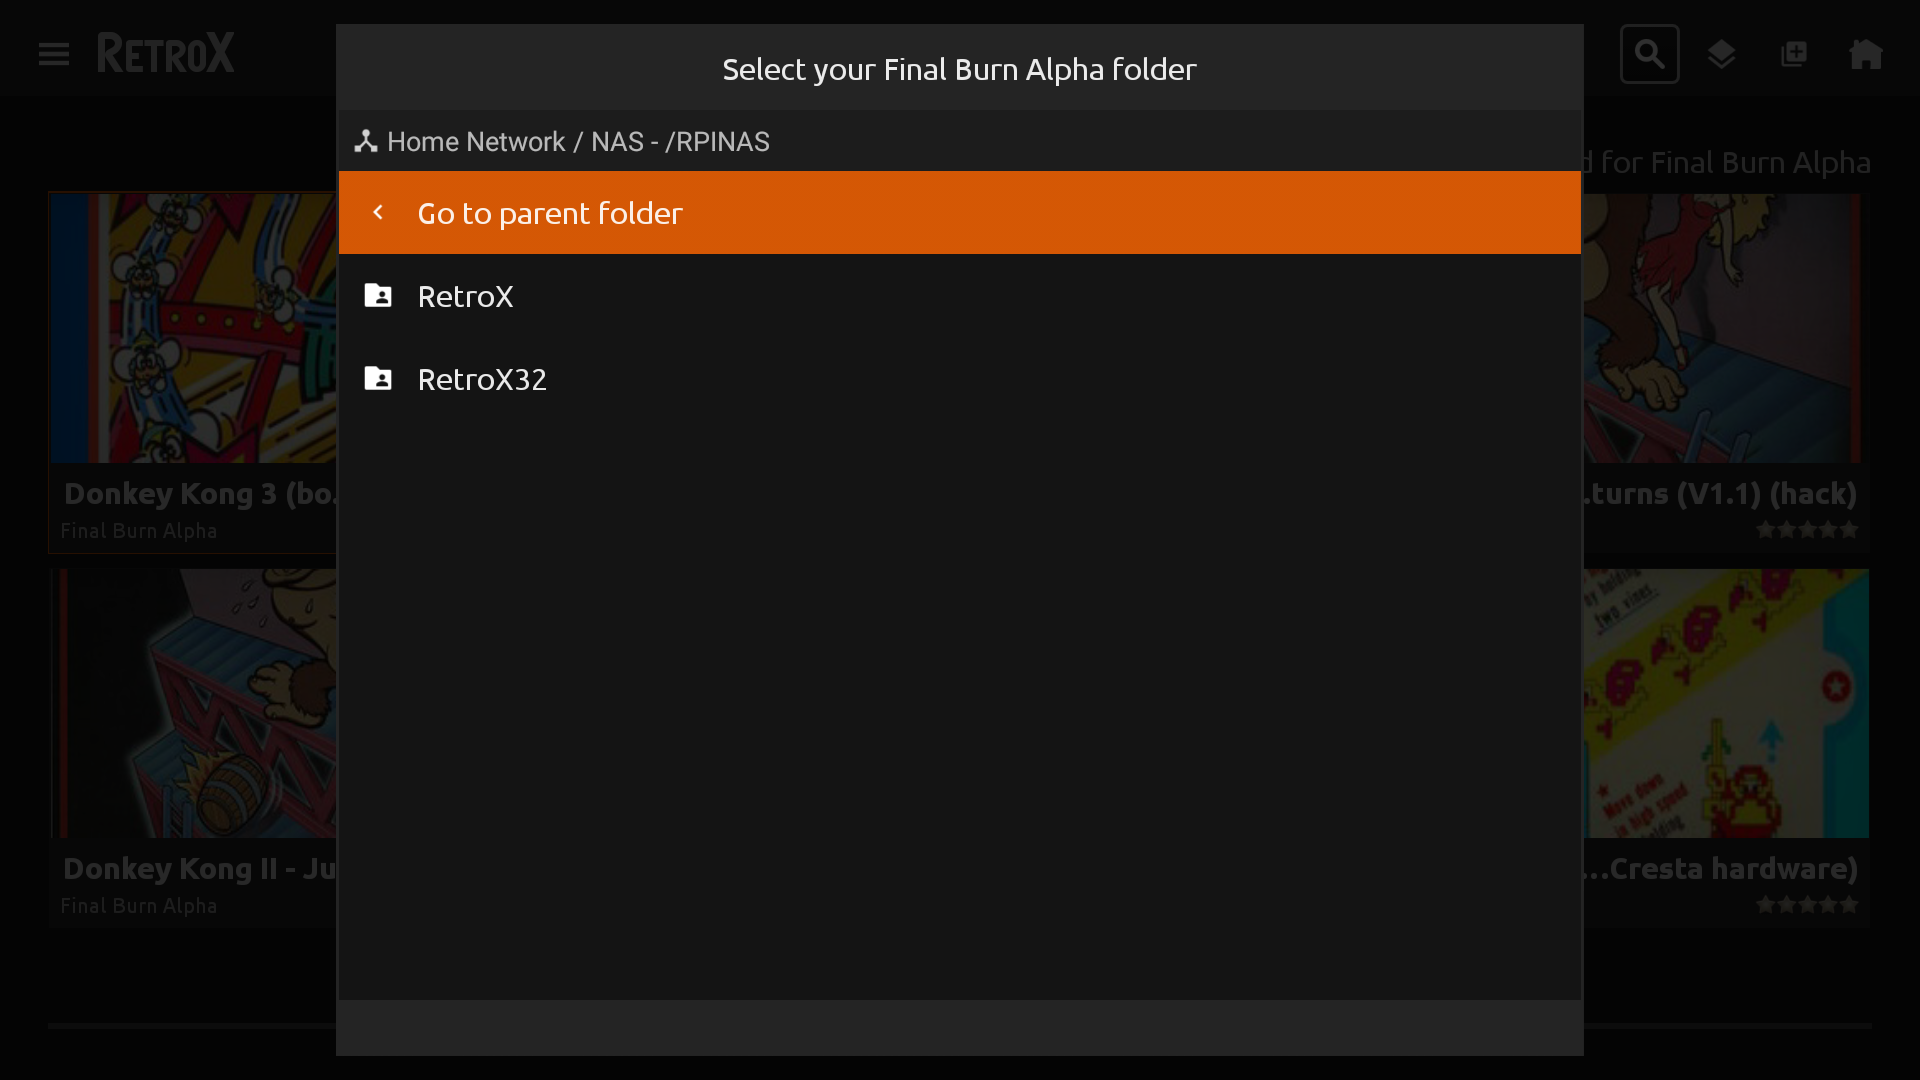
Your NAS on RetroX